
Permanent Patio Heater Placement: Heating a Patio Lounge Seating Area
Posted by Eric Kahn of Alfresco Heating on Aug 2nd 2024
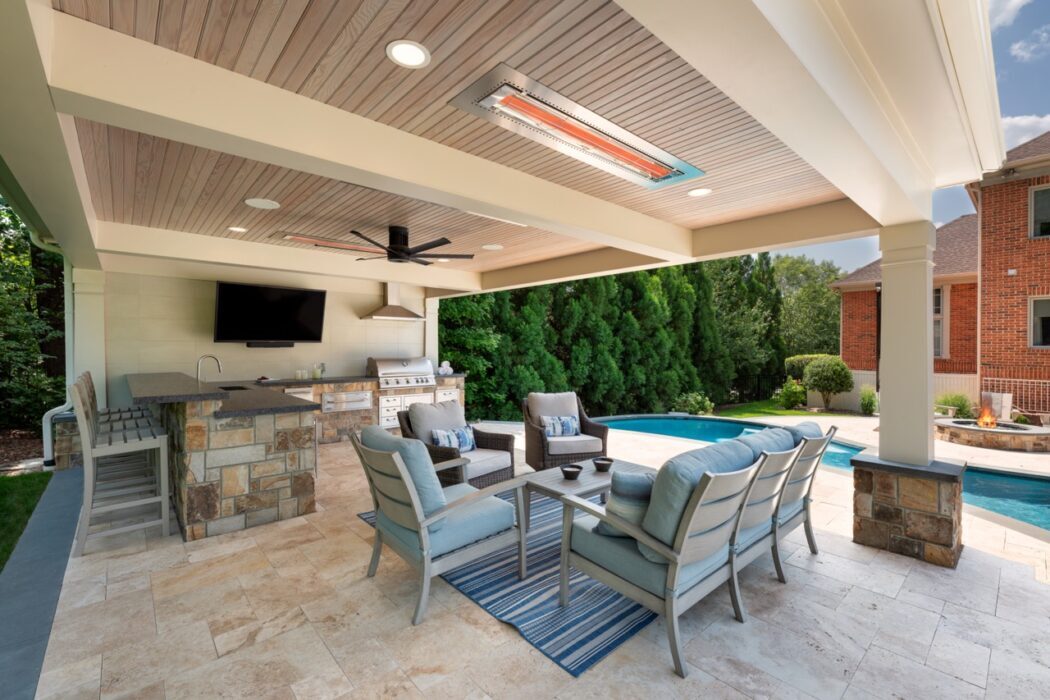
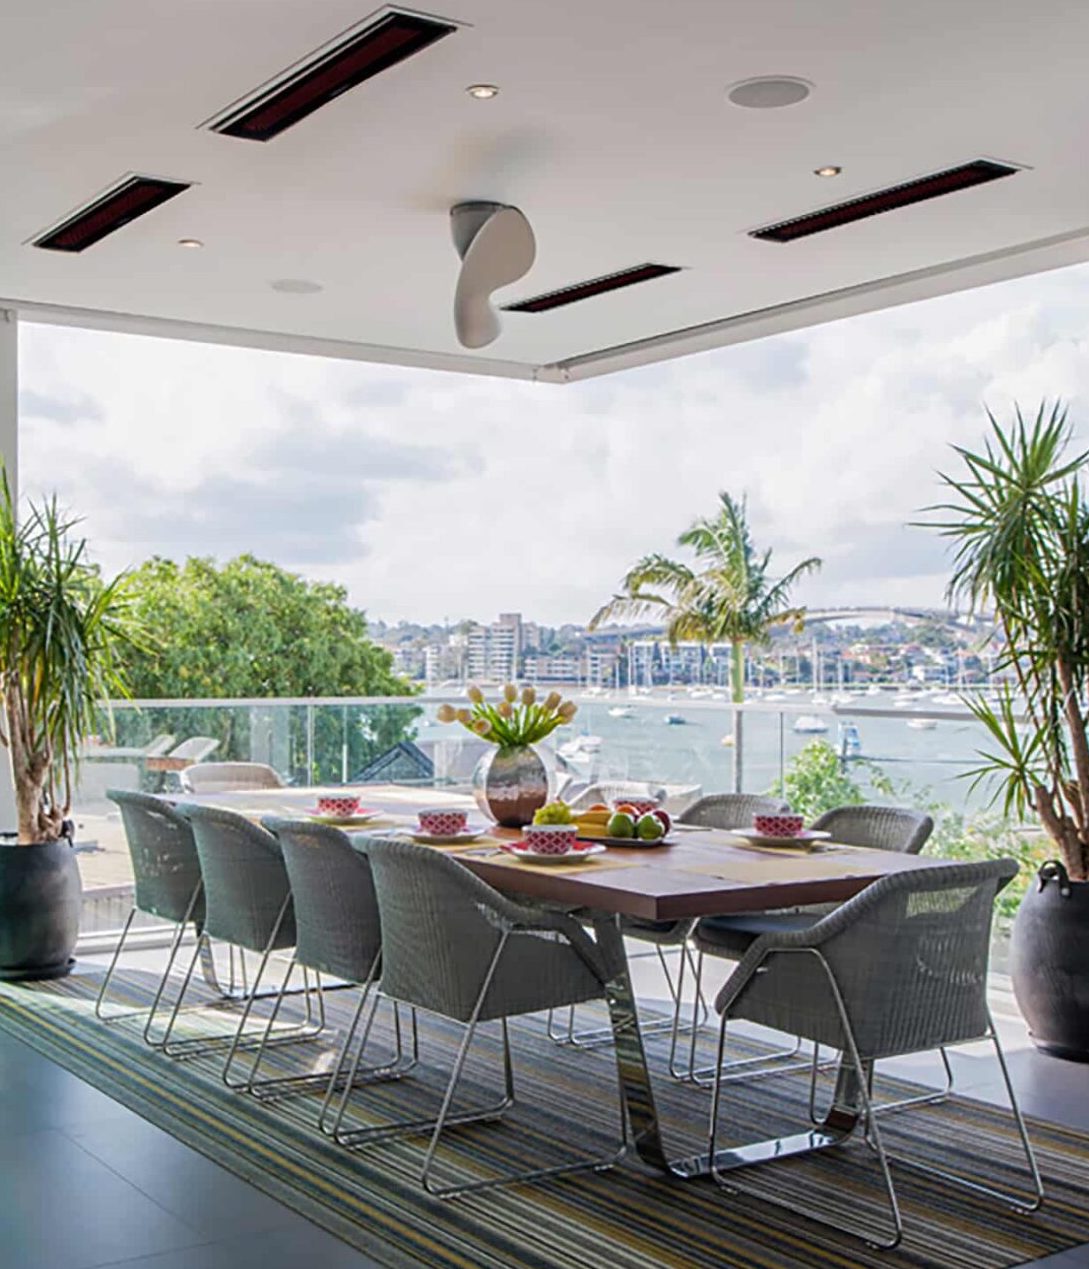
This flush-mounted patio heater is an example of method 1 (one ceiling patio heater placed in between two sofas). A single outdoor heater angled straight down can be effective in this orientation
Patio heaters, with direct sight lines from the orange glow of the heaters’ surfaces to the lounge seating below, are excellent outdoor seat warmers. Ideally preheat your outdoor seating for 20-30 minutes before use. As the patio heaters glow, tables, and other close-by furniture, heat up, transforming an outdoor lounge from too cold for comfort into a cozy-warm environment.
In a general way, there are two equally important parts to designing effective permanent heat for your patio, deck, pergola, gazebo, or other seating area:
- Selecting the right patio heaters for your environment based on exposure, ambient weather conditions, seasons of use, furniture layout, structural limitations, and aesthetics.
- Placing the patio heaters in such a way as to provide effective warmth and energy efficiency, with additional consideration to aesthetics.
This article is about item #2: placement of permanent overhead patio heaters. I focus on designing heating for your outdoor living area. You can also refer to my short article on how to heat an outdoor dining area with overhead patio heaters. In either case, I suggest that you also contact an expert, such as one of ours at Alfresco Heating, for guidance on choosing the optimal outdoor heaters for your own outdoor environment. This article only applies to overhead gas and overhead electric patio heaters. A ceiling, eve, pergola, trellis, or high wall is needed for all of the patio heater design applications here.
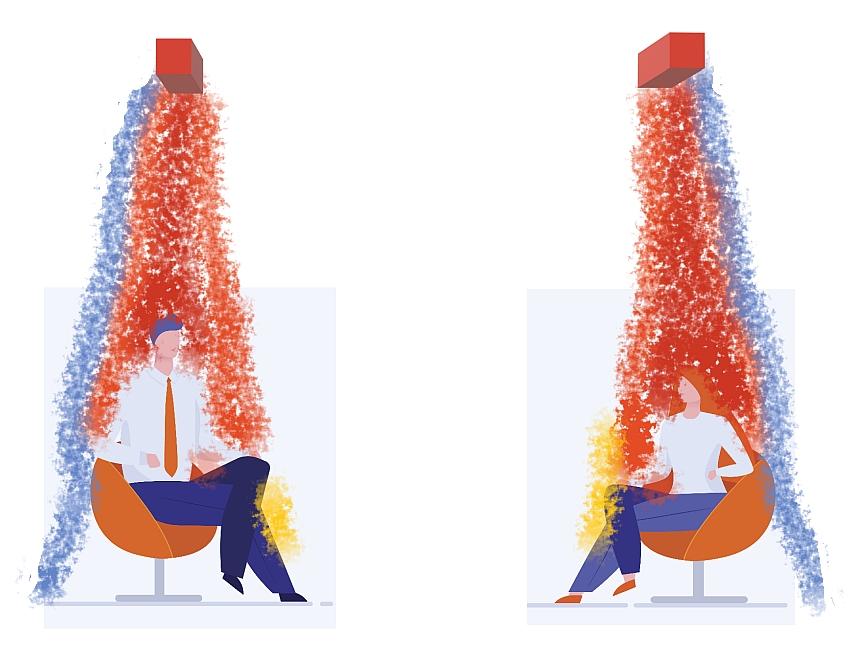
1. One ceiling patio heater placed in between two sofas
Often this overhead patio heater can be over a coffee table. This is the most bang you can get for your buck, as a single outdoor heater angled straight down can be effective in this orientation, so long as it is sized properly and the area of coverage is not too big - typically 10’ x 10’ or less.
Advantages:
- This is the best bang for the buck as only one overhead patio heater is used for up to a 10’x10’ area.
- The radiant heat evenly reaches people’s faces, chests, and laps, as well as heating the seat and back of any unoccupied furniture.
- A coffee table below the heater is well heated and becomes a secondary source of radiant heat.
- The heat is not over anybody’s head.
- Some electric patio heaters can be flush-mounted into a level ceiling in this configuration
Disadvantages:
- It’s only one permanent patio heater, which provides less heat than two.
- The amount of coverage is limited. Depending on the power and height of the patio heater the coverage might be 10’ x 10’, but will be less in areas that are more open to the elements. For example, it’s less likely to be enough heat under a pergola with four open sides than under a ceiling with only one open side.
Suggestions:
- Get good advice from experts about choosing the size, power, and controls of the overhead patio heater.
- Angle the permanent patio heater straight down and exactly centered between the two sofas.
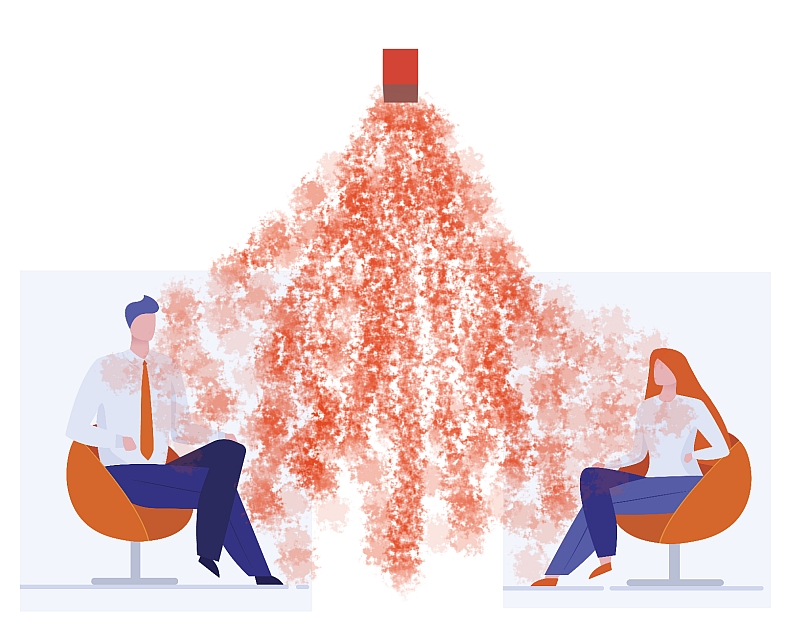
2. Two ceiling patio heaters placed in front of two sofas
This can be the best way to heat a seating area. There is ample heat and the placement of the ceiling patio heaters in front of the seats enables the closer heat source to radiate over much of the bodies under them.
Advantages:
- Two heaters placed close to where people sit can provide ample heat.
- The infrared heat evenly reaches people’s faces, chests, and laps, as well as heating the seat and back of any unoccupied furniture, and the floor where people place their feet.
- The heat is not over anybody’s head.
Disadvantages:
- Angled heaters can’t be flush mounted.
Suggestions:
- Place the heaters one foot to two feet in front of where people’s knees will be.
- Angle the heaters towards the seat cushions.
- Get expert advice on which heaters and controls to choose.
_________________________________________________________________________
3. Two ceiling patio heaters over people’s knees
In some cases the placement of the overhead patio heaters has to be closer to the seats. This could be because the sofas are close together, because of a ceiling fan in the center, or because of beam placements on a pergola. In a case like this the heaters can be over people’s knees or farther from their heads, but no closer.
Advantages:
- Good coverage on shoulders and laps
- Not directly over anybody’s heads
- Ceiling mounted patio heaters in this orientation can be effective when angled towards the seat cushion or angled straight down.
- If angled straight down they could be flush mounted in a level ceiling.
Disadvantages:
- This placement is a little bit more intense on the head and heats the chest (and empty seat back) only moderately.
Suggestions:
- Try angling the permanent patio heaters at the cushions and then straight down to see which feels better.
- Get expert advice on which heaters and controls to choose.
_________________________________________________________________________
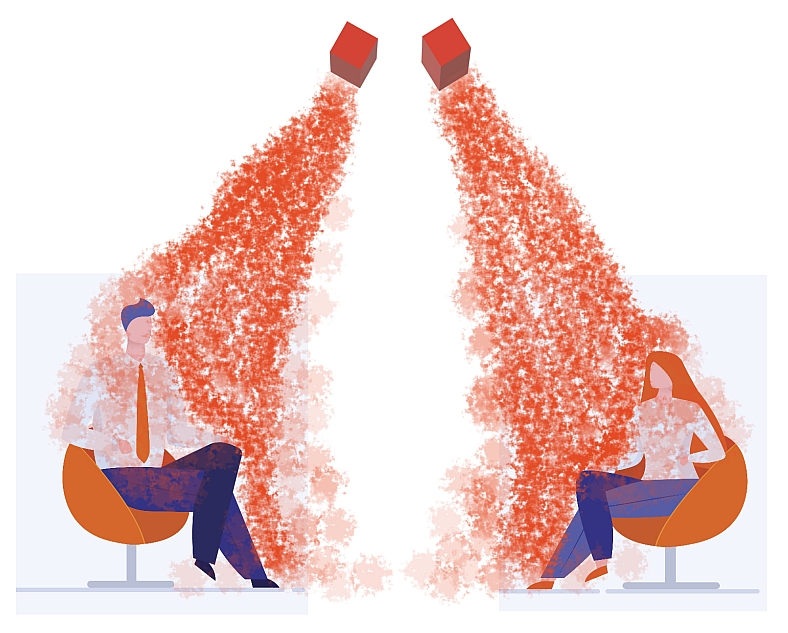
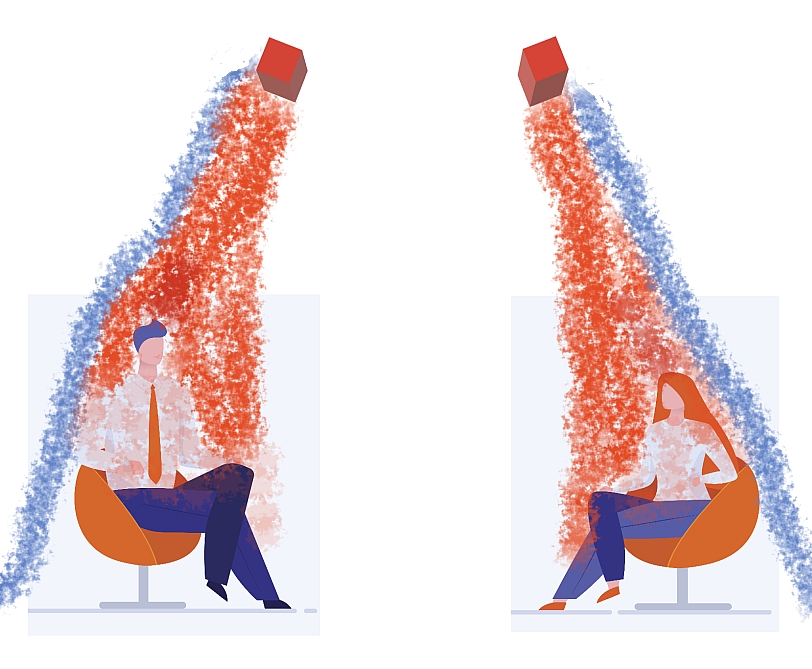
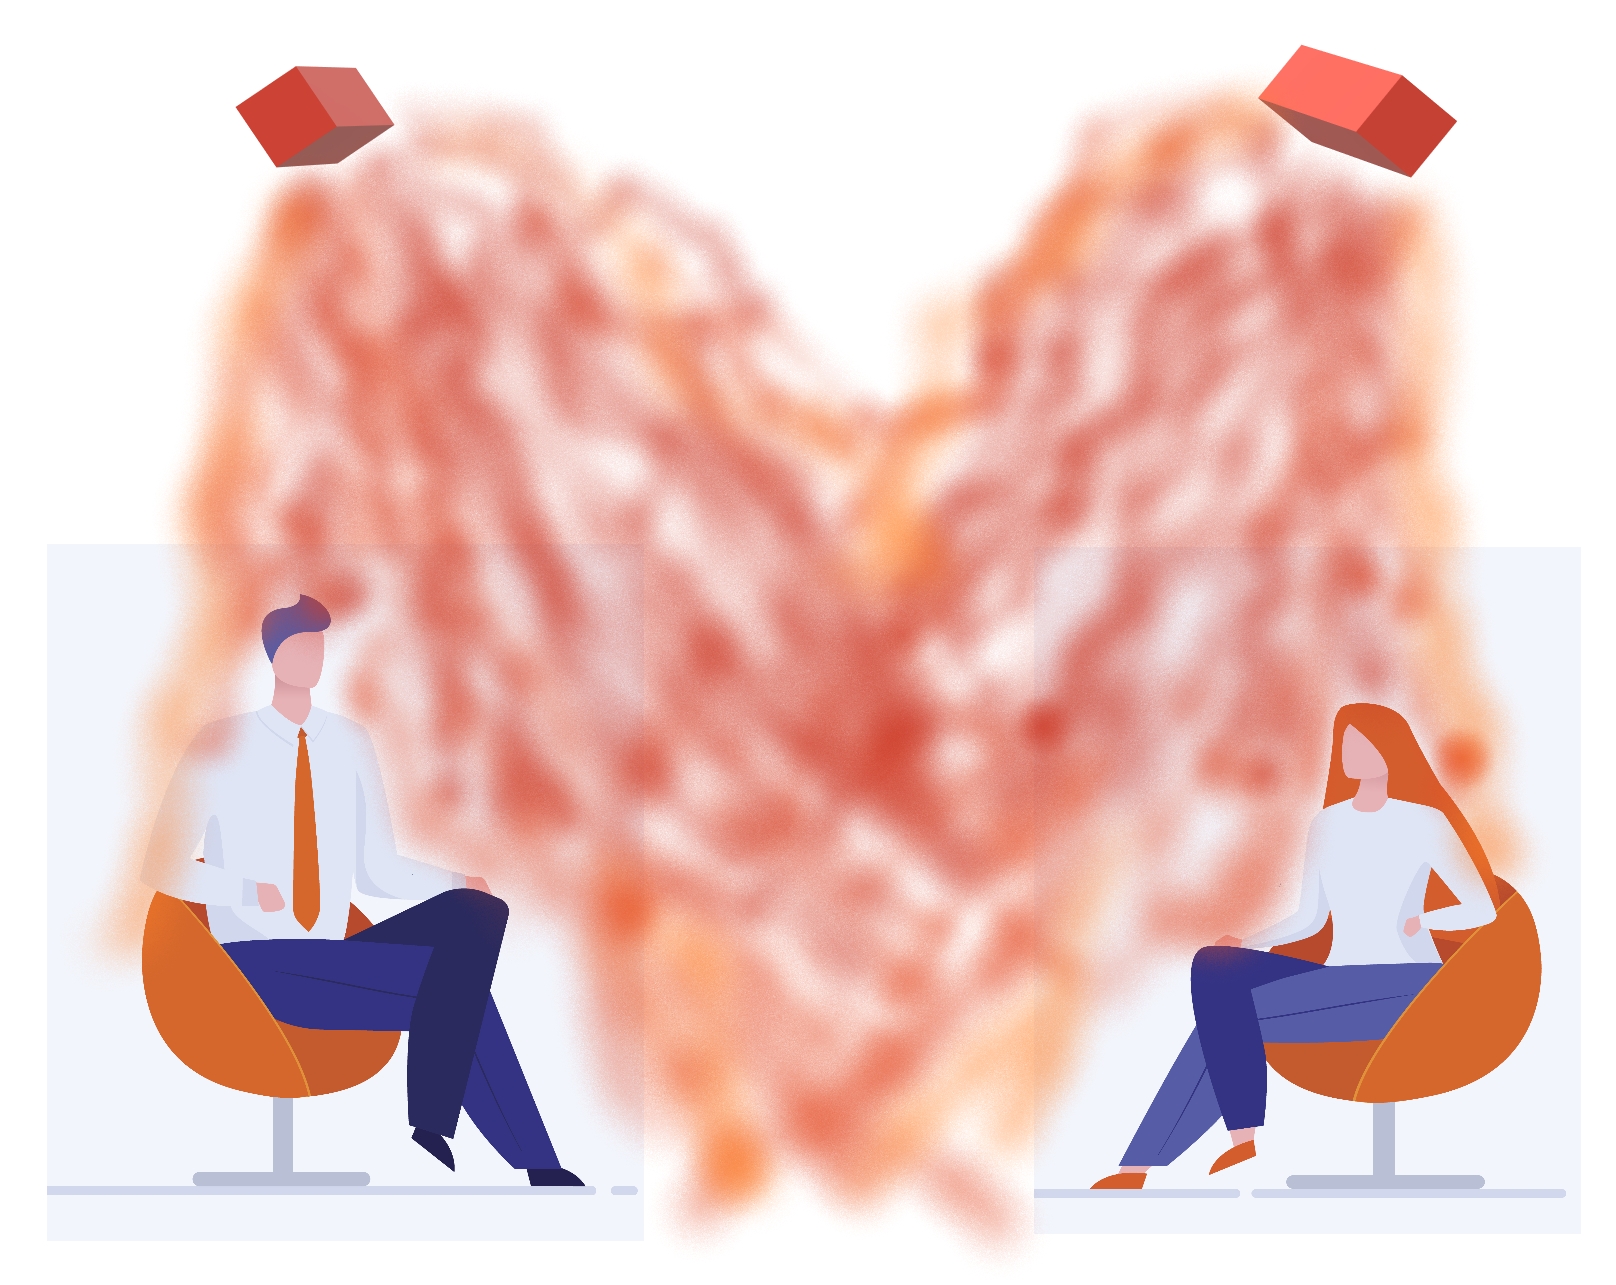
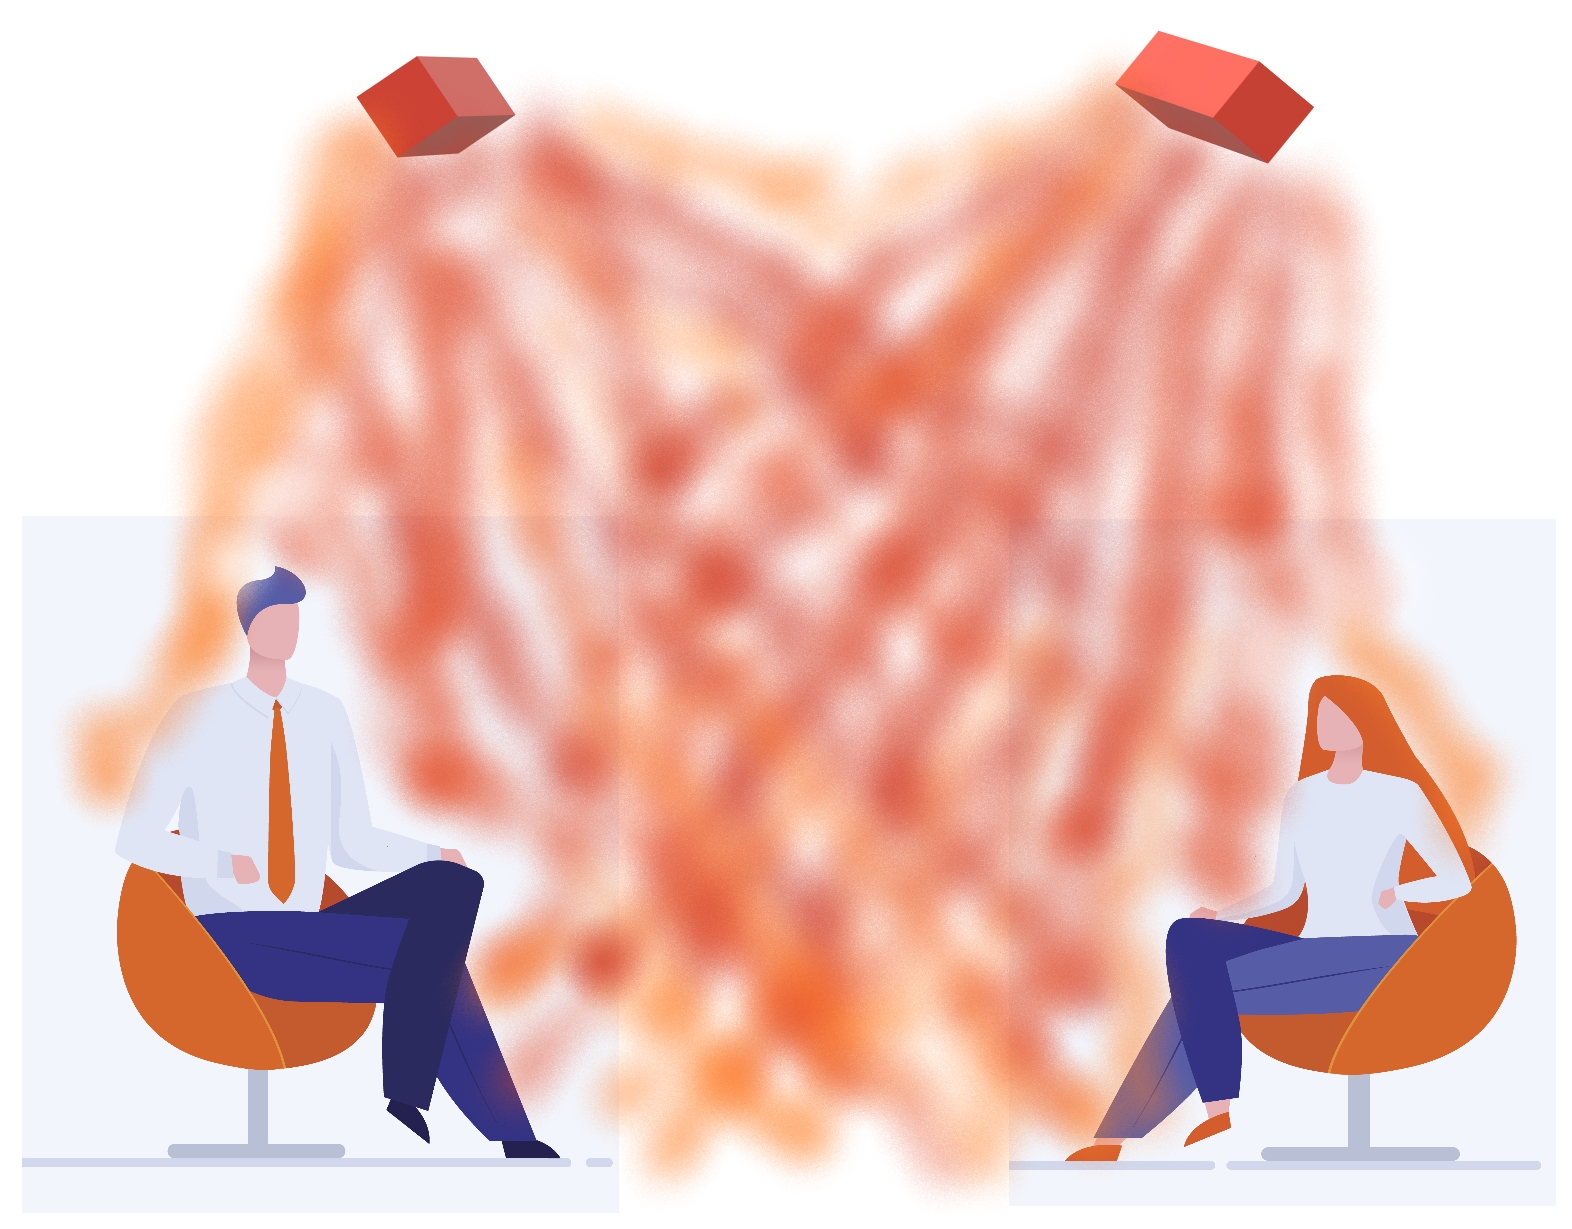
4. Two ceiling patio heaters placed over people’s heads
Just don’t do it! The cardinal rule about overhead patio heating is never place patio heaters directly over stationary people’s heads.
These patio heaters are directly mounted over seated peoples’ heads, which can be unpleasant
Advantages:
- People under these heaters will quickly feel heat on their heads.
Disadvantages:
- Patio heaters aimed at heads often feels like getting a sunburn, especially for bald people.
- While heads are hot, relatively little radiant heat reaches the important large surface areas of laps, tables, and sofa cushions.
- If heaters are turned to lower settings to reduce the intensity on human heads, the rest of the area does not get enough heat.
Suggestions:
- Don’t do it.
- Figure out another way.
- Get experts to help.
_________________________________________________________________________
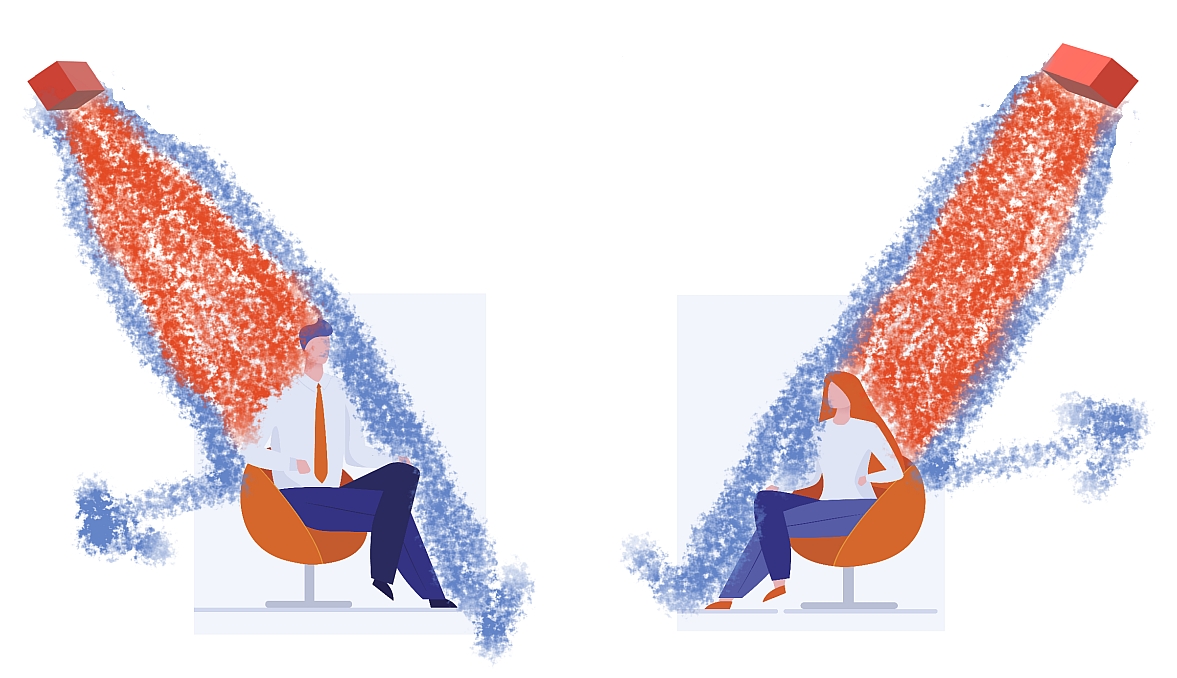
5. Two ceiling patio heaters placed just behind seating
(Not recommended.) When heaters are placed just behind people’s heads and angled in it is similar to putting heaters directly over people’s heads. It is unpleasantly hot on the tops of the heads unless the heaters are turned down, and then they don’t provide adequate heat to the rest of the area. The shoulders are the only area that get a nice amount of heat. Some of the heat bounces off the backs of the chairs. Heat doesn’t reach laps because of the human body obstructing the way. This is one of the worst areas to place patio heaters. (The alternative is to angle the heaters straight down, or put the heaters at a high angle, either of which reduces the intensity somewhat but also wastes heat by sending less of it towards the seating area.)
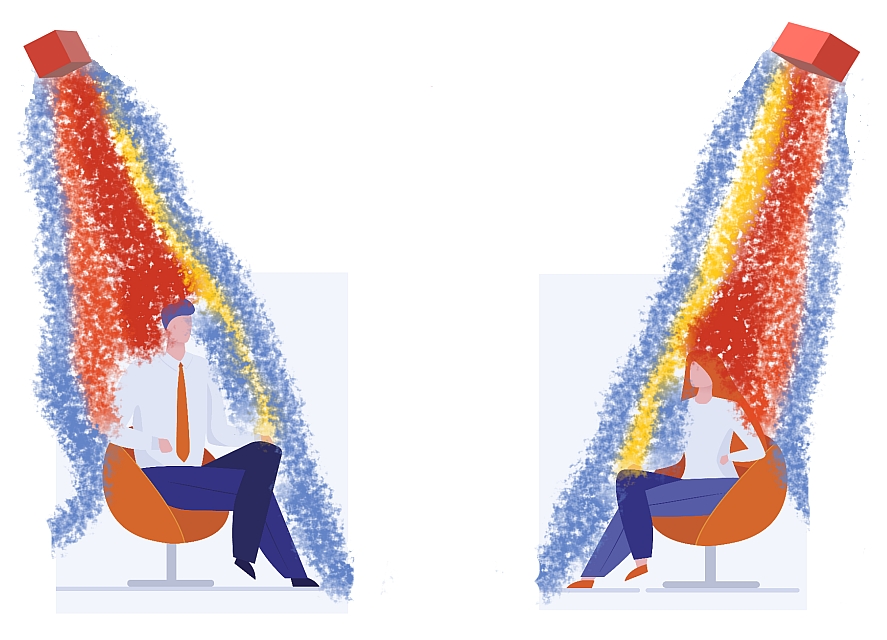
The patio heaters are aimed at the top of diners’ heads, which will feel scalding. The people on the other side of the table will feel cold at the same time. This is a bad installation. But it looks good
Advantages:
- Heat from both sides.
- Good heat on shoulders.
Disadvantages:
- Heat is too intense on the top of heads.
- Small amount of body surface area is heated.
- Small amount of furniture surface area is heated.
- Heat that reflects off the back of the chairs is wasted.
Suggestions:
If you can, move the heaters to two to four feet from the back of people’s heads. (Method 6.) I recommend:
- Angle the heaters towards the seating area
- Use mesh back chairs or stools to allow the radiant heat to pass through.
If you can’t move the heaters back then move them in front of the people.
If you can’t do either of the above, then angle the radiant outdoor heaters straight down or slightly away from the seated people. This is not an ideal solution.
6. Two wall patio heaters placed behind seating
Sometimes the most convenient placement of permanent patio heaters is at the wall behind the seating area. This may be because it’s hard to mount to the ceiling, because the sightlines are best if the heaters are at the edges of the patio, or because a brand and model of patio heater that has been selected is designed to be tilted at a high angle and cannot be angled downwards, or there is no ceiling.
Advantages:
- There is good heat on the backs of heads and shoulders.
- The patio heaters are visually out of the way.
- There is heat from both sides, although it’s much warmer on shoulders than on faces.
Disadvantages:
- A small amount of body surface area is heated.
- A small amount of furniture surface area is heated.
- Heat that reflects off the back of the chairs is wasted.
Suggestions:
- Use mesh back chairs to allow the radiant heat to pass through, or use stools.
- Place the wall-mount patio heaters two to four feet from the back of people’s heads.
- The optimal horizontal distance from the patio heaters to the backs of the chairs is two to three feet.
- Closer the heat will be too intense on the sitting people’s heads
- Farther there will be diminishing heat returns.
- Angle the radiant patio heaters towards the seating area.
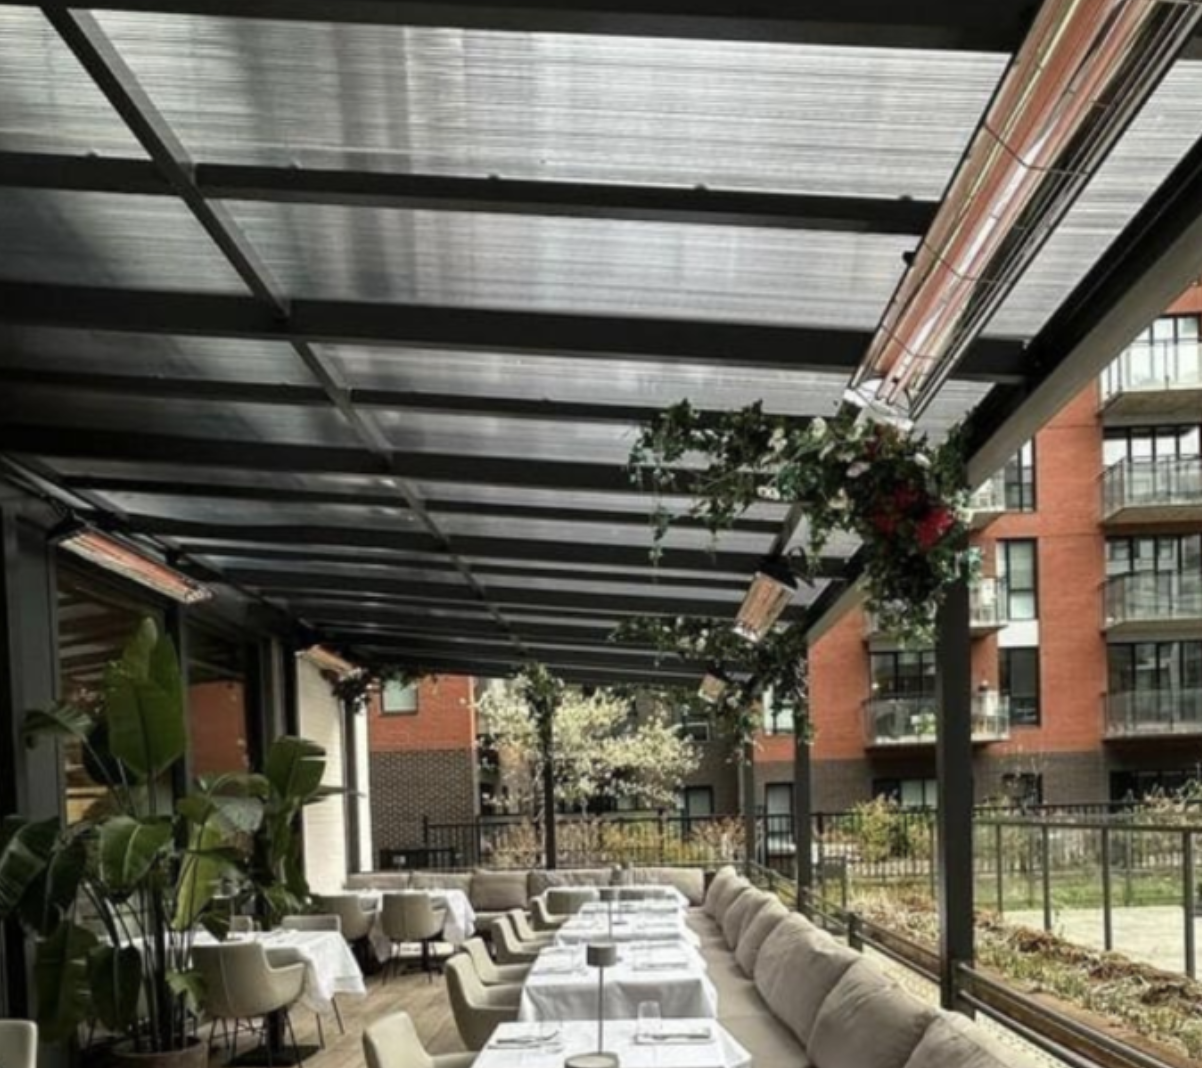
7. Two patio heaters at the outer edge over seating
Sometimes the most convenient placement of permanent patio heaters is at the wall and the seating area is also at the same wall. This may be because it’s hard to mount to the ceiling, because the sightlines are best if the heaters are at the edges of the patio, or because a brand and model of patio heater that has been selected is designed to be tilted at a high angle and cannot be angled downwards, or there is no ceiling.

While this design looks great, it could be improved upon by using extended brackets
Advantages:
- The patio heaters are visually out of the way.
- There is heat from both sides, although it’s much warmer on heads and shoulders than on faces.
Disadvantages:
- The heat is too intense on the tops of heads, similar to method 5.
Suggestions:
- Angle the radiant patio heaters towards the center of the seating area.
- Position the sofas as far back as possible.
- If possible use extended brackets (7b.) .
7b: A better way to install patio heaters in this situation
- The use of extended brackets brings the heaters past the sitting people’s heads and over their knees.
Advantages:
- There is a good balance of heat.
- There’s not too much intensity on the heads.
Disadvantages:
- The patio heaters are less tucked out of the way.
Suggestions:
- Angle the radiant patio heaters towards the center of the seating area.
- Position the sofas as far back as possible.
Stock images from: Designed by pch.vector / Freepik
© 2024 Alfresco Heating. All rights reserved. May not be copied or used without express permission